
Hanging a wallpaper? You have found the ultimate guide you need for the task. When you are to choose your wallpaper glue, prepare your walls, cut your paper, hang and match patters, things can get a little confusing. However, if you are installing wallpaper for the first time, there's no reason to feel overwhelmed. By following these simple and complete guidelines, this task is completely achievable by yourself. Grab on to this complete Wallpaper Installation Guide and Troubleshooting and let's get started!
How do you imagine your walls once you've accomplished your new wallpaper installation? Stunning, right? We do too, and this is exactly what we will help you accomplish with this comprehensive guide. In this article, we explain in detail all of the aspects you need to take into consideration for your wallpaper installation. Plus we provide you with some troubleshooting advice that you should read carefully to avoid any possible mistakes.
What we will cover in this Wallpaper Installation Guide & Troubleshooting:
1. Understand your wallpaper material
2. Materials you'll need to install your wallpaper like a pro
3. Wall preparation: Cleaning your walls, removing old wall coverings, evening wall surfaces, working with porous walls
4. Wallpaper glue: Choose your glue type
5. Level, measure and cut your wallpaper to assure great results
6. Apply wallpaper glue: How to apply and special considerations when applying paste
7. Hang your wallpaper: From the first strip to drying
8. Troubleshooting: Stains, opening steams, gaps, shading, designs dropping or rising, showing through, bubbles and Blisters

Read on for a full guidance to install our non-woven wallpapers and download our summarised checklist for when you're at it! (Download Wallpaper Installation Checklist here)
Quick note about installing Forest Homes' wallpaper
The hanging process is is much the same as any other conventional wallpaper, using normal wallpaper paste, and matching each drop of wallpaper to the next until the mural is complete.
A full detailed step by step guide is included with every purchase, which explains the simple hanging process in full, making it very simple even for a novice.
Watch a summary video of wallpaper installation here.
You can also download our fully detailed installation guide with troubleshooting here.
1. Understand your wallpaper material
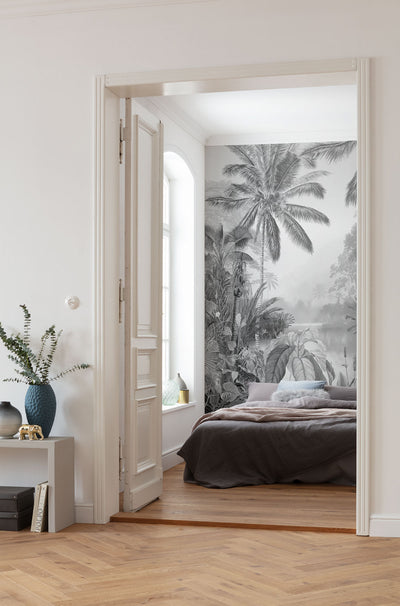
Installing wallpaper is all about following the right protocol. There are many different types of wallpaper materials available in the market. At Forest Homes, we choose to offer non-woven wallpaper due to the wide range of application of this material and its respect for the health of people and the planet. Let's have a look at the main features of this wallpaper.
Non-woven wallpaper
Non-wovens are the most user-friendly wallpapers available on the market. They are very easy to install and the best part is that you can reuse the wallpaper as many times as you want without restrictions. Following the right process, you are free to apply and remove the non-woven wallpaper from your walls. See here our range of non-woven wallpapers.

2. Materials you'll need for wallpaper installation
For the installation of wallpaper, please gather the best quality you can find of the following products:
- Measuring tape
- Wallpaper glue (often included with our custom wallpaper)
- Paper cutter and/or scissors
- Stanley blades (or utility knife)
- Soft cloth
- Large steel ruler
- Paint roller
- One big and one small paintbrush
- Safe stepladder
- Pencil
- Wall covering smoother (or felt roller)
- Plumb line or spirit level
- Seam roller (optional)
About materials, experts also give us their secrets to perform an outstanding job. Interior designer Allison Anderson for example, recommends that to use a roller, and not a brush to apply your wallpaper paste super-smoothly on to the wallpaper.
3. Wall preparation
When it comes to hanging the wallpaper, preparation is the key. Your wall should be dry, clean and smooth. It is important that you remove all the old cobwebs, debris, dust and grime from your wall.
Cleaning your wall
If your wall is fairly clean or recently painted, simply run a dry cloth over the surface and swipe the dust that might accumulate over time. If your wall is fairly dusty or stained, one of the best ways to clean your walls is using sugar soap on your walls. Sugar soap is a type of chemical cleaner usually used to wash walls before painting them, but also to refresh dingy-looking paint.
Start by protecting your floors, furniture and electric appliances. (See this video on how to carefully protect all your floors). Then, apply the mixture of sugar soap and warm water, and thoroughly rinse it off the wall with a foam sponge. This cleaning will reveal your beautiful walls. See how to follow the sugar soap cleaning process in detail here.
What to do if your walls have imperfections or are porous?
Prior to wallpaper application, you could use sandpaper to remove any irregularities from your wall (Watch this video on How to Sandpaper Your Walls). In case there are some old wall coverings, it is better that you remove them as well (Watch this video on How to Remove Old Wallpaper) Once, you've properly removed the old wallpaper, make sure you allow it to dry properly. There should be no moisture on your wall because it will make it difficult to hang your wallpaper. Note: You could also paste the new wallpaper onto older wallpaper. See in here how you can do it.
If your wall surfaces are porous or highly absorbent, it is better to treat them with a sizing process to assure that wallpaper will attach perfectly. When it comes to applying the wallpaper paste, it will attach itself to the sizer and stick a lot better. Learn more about sizing your walls in here.
Using lining paper for irregular walls
If there are too many imperfections on your walls, we recommend using lining paper before the wallpaper - it covers imperfections and provides a smooth base for your wallpaper. See exactly how to hang lining paper in here.

4. Choose and prepare wallpaper glue
It is important that you mix and prepare your glue accordingly. For non-woven wallpapers, a wheat or cellulose wallpaper is a good fit. For our wallpapers, you will need to use a clear non-staining adhesive to apply to your wall, which is often included in our custom size wallpaper. Our wallpapers can be applied with a simple paste the wall technique.
Let's have a look at a few glue options that you could use throughout your process and some recommendations for mixing your paste.
Types of wallpaper glue or paste
There are different types of glue to use at different types of wallpaper installation.
Glue Size
If you are papering a newly plastered wall, you will need to prepare the wall first. Glue size (sometimes known as primer or sealer) will seal and prime the new plaster, stopping it from soaking up the adhesive and making the surface easier to paper on. If you don’t do this, it is likely that the adhesive will just be soaked up by the porous new plaster, and the paper won’t stick. You can buy specific Glue size products, or some wallpaper adhesives can be diluted to do the same job – check the instructions on the packet for ‘sizing’ details.
Cold Water Paste
Cold water pastes come in powder form and require you to mix them yourself. These pastes are made from a wheat or other starch-based powder. Mixing up the paste can be a bit tricky – getting the consistency right is the hard part. Too runny and it will just slop everywhere and not stick, but too thick and you’ll get lumps. However water-based pastes do have an advantage in that they tend to take the longest to dry, giving you more of a chance to correct mistakes.
Cold water paste is suitable for most types of wallpaper and can be mixed to different strengths depending on the weight of the paper. It is also one of the easiest types of adhesive to remove, as it is water-soluble.
All-Purpose Paste
All-purpose adhesives have been developed to be used with any type of paper and come either in powder form or ready-mixed. These pastes usually contain a fungicide to prevent mould growth. If you are papering in a kitchen or bathroom, make sure your chosen adhesive contains a fungicide. Check to make sure what type of adhesive is suitable as some may affect the printing ink.
Heavy-Duty/Extra Strong Paste
Heavy-duty adhesives are quite likely to be vinyl-based. This type of adhesive dries quicker, so you don’t run the risk of a heavy, quality wallpaper falling off the wall before the paste has a chance to dry. Use a heavy-duty adhesive if the paper you have chosen is a high-grade, thick paper. Vinyl adhesive is much harder to remove than cold water paste so bear that in mind when thinking about future decorating.
Paste-the-Wall
Instead of applying paste to each panel and having to soak your paper in water, making it heavy, messy, and challenging to work with, with paste the wall you simply apply adhesive to the entire wall and stick the sheets of dry wallpaper on top. This is the type of paste and technique used with our wallpapers.
Ready-to-Use Paste
Tubs of ready-to-use adhesive mean that you don’t have to worry about mixing the paste to the correct consistency. However, they do tend to be more expensive. Although it can be an easier option, it is more suitable for a small room or if you are just papering one feature wall. Ready-to-use adhesives are often vinyl-based, a special mixture that doesn’t set until it is exposed to the air.

5. Level, measure and cut the wallpaper
This is the most important and difficult step of the process. If there is a pattern on the wallpaper you will have to be extra careful because it has to match in the right manner. In case you are a beginner, it is always better to buy some extra wallpaper, so you can easily make up for the occasional mistakes.
Level your walls
Hang a plumb line against the wall and draw along its vertical line with your pencil (the plumb line, like a spirit level, gives you a perfectly straight line to help ensure the paper hangs straight and not at an angle). Do this at regular points along each wall (eg, the left-hand edge, middle and right-hand edge), because the floors and ceilings of most rooms are uneven.
Measure walls and wallpaper
Now use the tape to measure the floor-to-ceiling height of the wall along these vertical lines, and use these measures later to trim your wallpaper to size, if it is not already custom-made.
Pro tip: you don't have to measure each strip of paper individually; instead, make a mark on the table and use this as a guide. We recommend to leave an extra 5cm top and bottom for errors. Don't cut too many strips at once if the wall is uneven; you'll just end up recutting them.
Trim the wallpaper
Spread the wallpaper and place points from where you have to cut it. It doesn't hurt to be a little extra careful while cutting the wallpaper. Place paper cutter /scissors in symmetry to the table (steel) ruler to avoid any mistakes.
6. Apply wallpaper glue
To apply the glue, we prefer to use a roller, and not a brush. The roller allow you to apply your wallpaper paste more smoothly onto the wall.
Do not apply paste to the whole wall, as it will dry and become unusable. Paste as you go, pasting just wider than the drop you are hanging. Any excess paste on the ceiling, skirting etc. should be gently removed with a clean wet sponge before it is allowed to dry.
For our non-woven wallpapers, it is better to apply the glue onto the walls to make the installation easier.

7. Hang your wallpaper
Starting with your first drop of wallpaper
Being careful not to crease it, loosely roll your first drop of wallpaper so the top and back of the wallpaper is on the outside. Making sure the pattern is the correct way up, apply your first drop to the wall, letting the wallpaper overlap a few cm at the ceiling, and 1 or 2 cm at the adjoining wall. Hold the wallpaper at the top and move into a straight position using your plumb line as a guide. Whilst the paste is wet you can slide the top of wallpaper into the perfect position so it lines up on the plumb line. Unroll your drop along the plumb line, leaving a few cm at the bottom.
Using the wallpaper brush or smoothing tool, working top to bottom gently press the strip to the wall. Remove any air pockets by smoothing out from the middle towards the sides of the wallpaper. Wash off excess paste on the ceiling, skirting and wallpaper with a damp sponge and clean water. Do not allow any paste to dry on the surface of the wallpaper. Finally use your tool for smoothing the wallpaper (ex. a felt roller or wallpaper smoother) .
Using your utility knife trim the excess wallpaper along the ceiling and skirting. For a perfect finish always use a sharp knife or blade and make the cut in one clean movement.
Subsequent drops
Once the first drop is in place, apply the glue onto the next section of the wall. Before cutting the next drop, ensure you have allowed for the pattern match as well as a few cm extra top and bottom.
Hang your second drop of wallpaper as per the first, using the edge of the first drop as your guide. Joins should be tightly butted and never overlap. Avoid squeezing paste out of the joints. Wash off any excess paste after hanging each drop with a clean cloth. If necessary, you can then use a seam roller for the seams. Hands should be kept clean and dry. If the edges of the wallpaper do not stick to the wall properly, you need to apply more paste in those areas. Carefully apply paste under the edge with your small brush, being careful not to stretch the wallpaper.
After hanging one roll, the wallpaper should be inspected, the decision to continue is the responsibility of the decorator.
Hanging wallpaper in tricky areas
Corners
Working around the room one drop at a time, ensure each new wall is treated as per the first drop, and hung straight using a plumb line. Corners should be wallpapered using two separate drops. One drop should overlap the adjacent wall by 1 or 2cm, the other should be lined up into the corner. Do not attempt to push wallpaper into a corner.
Plug sockets & light switches
Ensure the power is off. Plug sockets and light switches should have the fascia removed, wallpaper should be laid over the top, carefully cut a cross diagonally from corner to corner. The excess can be cut in at the sides using a sharp knife and metal ruler. The rest of the drop must be firmly in place before light switches or plug sockets are cut in.
Drying the wallpaper
Allow the wallpaper time to dry slowly at room temperature; do not attempt to dry it quickly as shrinkage may occur.
Now, give yourself the honour of stepping back and appreciating your great work!
Pro tip
Use the same papering technique for the wallpaper, remembering to allow extra (up to 5cm) at the top and bottom of each strip for trimming. And if it's a very light pattern, make sure you paste the right side. For bold patterned paper, start on a feature in the middle of the room, and work outwards from that. For a small pattern you can start at the edge or corner of a wall. Either way, take great care to line the pattern up. And don't throw away any offcuts - they could come in hand later on to cover over any mistakes.

8. Wallpaper installation troubleshooting
Following are some of the more common problems which may be encountered when installing wallpaper, along with their likely cause and solutions. Most involve improper or poor surface preparation, inadequate inspection prior to hanging, or installation errors. All of these problems can be avoided if proper instructions are followed. We'll cover the following problems you may encounter (Source: Wallpaper Association & Wallpaper from 70s):
- Wallpaper stains
- Opening seams
- Curling / loose ends
- Tearing
- Gaps
- Shading
- Design dropping or rising at ceiling level
- Showing through
- Bubbles and blisters
1. How to avoid wallpaper stains
Wallpaper paste stains on high-quality and delicate wallpaper can be quite harmful when applying your wallpaper. Once they have dried up, they can only be removed with difficulty or not at all. When applying paste and hanging the wallpaper, you need to be careful and attentive to prevent paste stains or remove them before they dry. Learn these tips on how to avoid wallpaper stains.
a. Watch the excess glue
Pasting the wall: In the case of non-woven wallpapers, the paste is applied directly to the wall. Here, too, the rule is that the paste must not be applied too thickly. Apply the paste to the wall about a third beyond the first width of the strip of wallpaper. This will prevent you from coming into contact with the wallpaper that is already in situ when applying the paste for the next strip. You can subsequently remove any paste that has dried near the seams using a small brush. Since every new strip of wallpaper is usually "pushed" next to the seam of the previous strip, some of the paste will move toward this point, too. Excess paste will spill out on the front when the strips touch each other. With most printed wallpapers, you can remedy the situation by quickly removing the paste. However, you would no longer be able to save textile wallpapers at this point as the fibres soak up the paste straight away and cannot be cleaned. This problem can only be prevented by taking absolute care while working with this type of paper.
b. Wear gloves
Wallpaper adhesive can crop up anywhere, even in the most unlikely places. All it takes is a splotch here or a drop there. Paste also tends to stick to your hands. In the heat of the moment, you might not really notice it while putting up the wallpaper. Simply touching the wallpaper may cause problems if the paper has a delicate surface and your hands are sticky. Thin cotton gloves are generally a good idea as they enable you to put up delicate wallpapers cleanly and free of grease. Even if some paste does end up on the gloves, they soak it up immediately, whereas the sticky moisture would remain on the surface of rubber or plastic gloves.
c. Remove stains immediately, while they are wet
Traces of paste and paste stains must be removed immediately and while they are fresh and wet. Proceed as follows:
- Soak up excess paste with paper towels or an absorbent, lint-free cloth by dabbing carefully. Do not rub.
- Then moisten the spot with clear water (wet, clean cloth or lightly soaked small sponge) and carefully soak up and dab off any remainders.
You can only use clean water, with nothing added, to remove fresh as well as dried-up paste stains.
It is easy to overlook fresh paste stains if the lighting in the room is insufficient. Therefore, make sure everything is lit up well and brightly whilst working on your wallpapering project – a simple lightbulb is not fit for purpose. Fresh paste stains are easy to detect in daylight.
d. How to remove dried up stains in wallpaper?
Shiny or milky matt spots on the wallpaper are usually due to drying or dried up paste. Depending on the base material (see material type), it may still be possible to remove them, but you will require patience and nifty fingers.
To start with, you will need to re-moisten the paste stain. Please use only pure lukewarm water. Then take a dry, clean cloth or paper towel and dab off the moisture. Do not rub, scrub, or scratch. Instead, repeat the process after some time, if required. Please note that for some dispersion glues, it is usually not possible to remove dried-up stains without causing damage.
2. Opening seams
What may have caused your opening seams is:
- Excessive rolling of seams forcing adhesive from behind wallpaper.
- Failure to apply adhesive to edges when pasting.
- Allowing paste to dry on edges while booking.
A solution to reaffix loose seams is using special adhesives available.
3. Curling / loose ends
What may have caused your opening seams is one or more of the following reasons:
- Improper wall preparation, i.e. not sealed or no sizing.
- Not enough adhesive used.
- Adhesive dried too fast due to high temperature room.
If problem is restricted to ends or edges, wallpaper can be re-affixed using the proper adhesive.
4. Tearing
Tears at the moment of trimming could be caused by a dull blade. Use fresh blades with every strip.
5. Gaps
If small gaps appear between strips, they are usually caused by improper surface preparation that results in poor adhesion. They can also be caused by not butting strips tightly.
If not enough time is allowed, the wallpaper may continue to expand on the wall causing bubbles or blisters. If too much time is allowed, the edges may dry out and thus not adhere. Improper surface preparation may also cause some wallpapers to contract on the wall resulting in gaps. If wallpaper edges are stretched during hanging, as it dries on the wall, it may return to its original shape causing the gaps. They can sometimes be camouflaged by colouring the wall the same colour as the ground with a solvent-based marker. Tinting the primer/sealer approximately the same colour as the wallpaper ground is another way of hiding possible gaps.
6. Shading
If the shading is due to the ground colour not being consistent from roll to roll, the problem is one that occurred during printing and the wallpaper should not be hung in the first place.
7. Design dropping or rising at ceiling level
This may be caused by:
- Initial plumb line not truly vertical.
- Ceiling not on a horizontal plane.
- A combination of the two.
If caught at end of first wall, a new, true plumb line on next wall can help correct problem or minimise it if ceiling is not horizontal. If caught after second or the third strip, can be corrected by drawing new plumb line and double cutting adjoining incorrect strip. No way to correct if hanging has been completed.
8. Show through
Some wall coverings are thin enough to be semi-transparent and thus allow dark images caused by patching, etc. on the wall to show through.
This potential problem must be avoided by priming the wall with a pigmented wallpaper primer/sealer. If the wall is in particularly bad shape and a semi-transparent wallpaper will be used, lining paper should be applied first.
9. Bubbles & Blisters
Bubbles and blister may occur because of:
- Not smoothing out a strip smoothly.
- Hanging in temperatures below 50' Fahrenheit.
- Improper surface preparation.
- Not allowing the booked strips to relax the proper time.
Some can be eliminated by pricking and smoothing out or, if large, slitting and squeezing in more paste.

Photo: Illuminating Ivy Wallpaper at Forest Homes
Watch a longer video with detailed wallpaper installation steps here.
Final thoughts
We've covered a wide range of aspects regarding our wallpaper installation. However, every new wallpaper installation is specific to the situation. Did you consider this helpful? Tell us about your personal experience hanging your wallpaper. What else would you like advice on? Leave us a comment below. Look at some of our wallpaper ideas to get inspired at Forest Homes.


Fantastic guide on wallpaper installation and troubleshooting! Your tips are incredibly helpful and make the process seem much less daunting. Thanks for sharing such valuable information—definitely bookmarking this for future reference!
Leave a comment